![Post image for DIY [real] car seat upholstery – 1980 Ford Granada MKII](http://blog.modeljunkyard.com/wp-content/uploads/2014/08/diy-upholstery-seats-1980-ford-granada-mkii-sitze-beziehen-52.jpg)

Hello guys, I know this post might be a little bit off-topic since this is a blog about scale modeling… but I decided to share this new project with you anyway. Most of you guys are car guys and I thought you might like to see this project in the making as well and it might inspire you to expand the borders of your hobby some day. The accuracy and discipline of scale modeling skills can be used in other areas as well.
As in most cases, this is also a long story. I purchased this car almost 15 years ago. The story goes like this: in 1980 an old Ford engineer (at Ford Köln, Germany) retires and in March 1980 he buys a brand new Ford Granada as a retirement car. The good old man drew only with good weather and only when necessary. At age 90 the owner dies. His 70 year old son inherits the car and keeps it in the garage for several years. Around the year 2000 I was a student and wanted a cheap (big) car. I bought this great Ford Granada with only 50.000 km. The car looked and smelled like new.

I never thought I would still own the car 15 years later. The thing is that the car drives great and whenever I considered selling it I realized that it was a shame letting it go for a few hundred euros. So I kept it, and kept it and kept it. After finishing my studies in Germany I took it to Spain, then back to Germany, then back to Spain and finally to The Netherlands where I live now.
See more pics of my Ford Granada, some customizing ideas that finally I never did, a Ford Granada meeting in Germany, an other meeting in the Netherlands and a few junked Taunus and one Granada in Argentina.
BURN BABY, BURN!
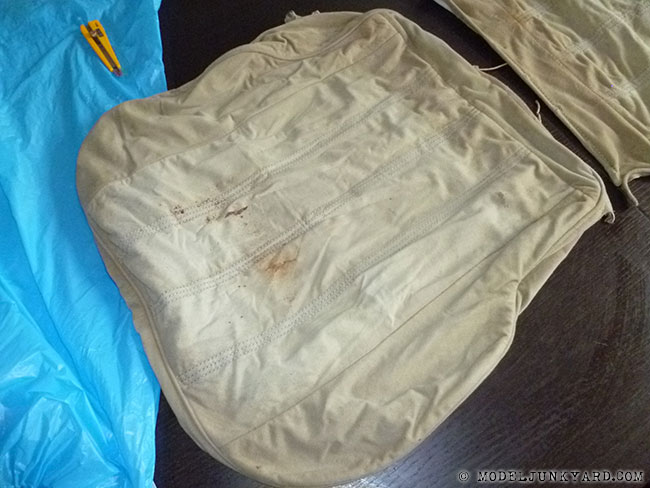
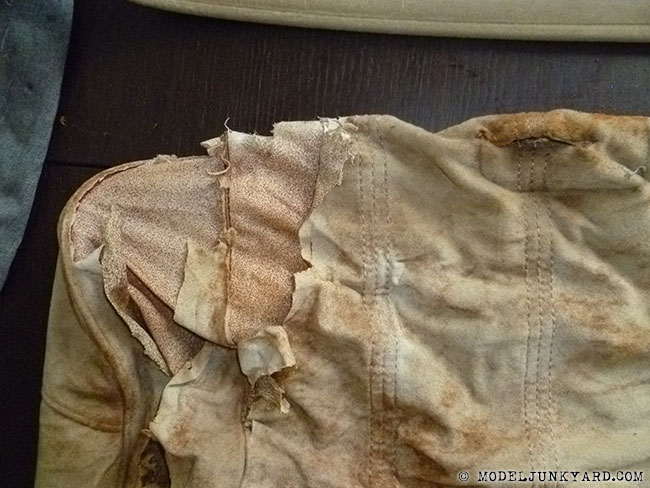
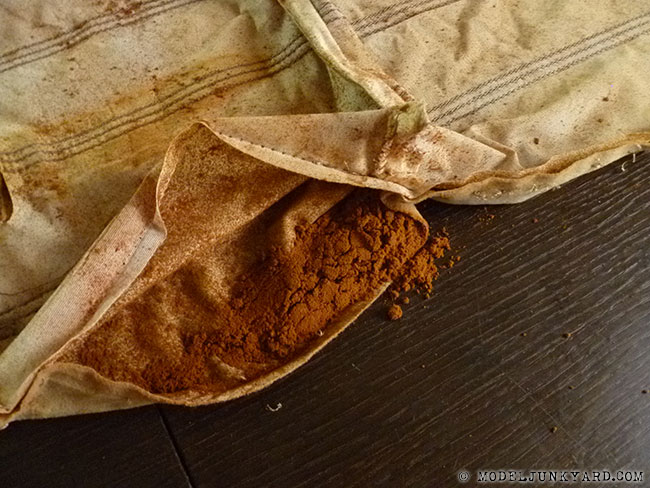
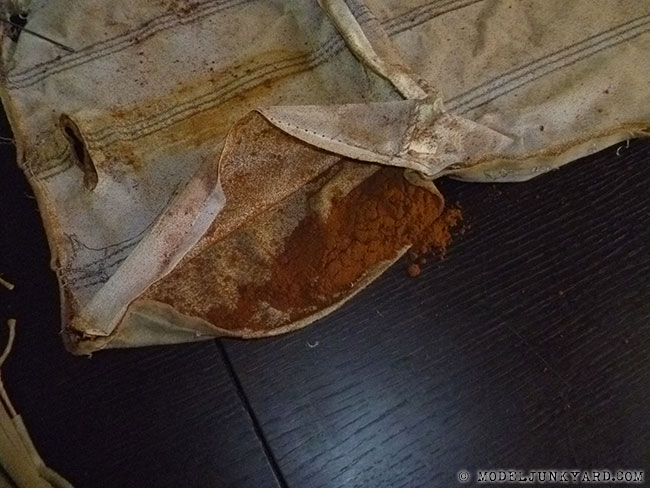
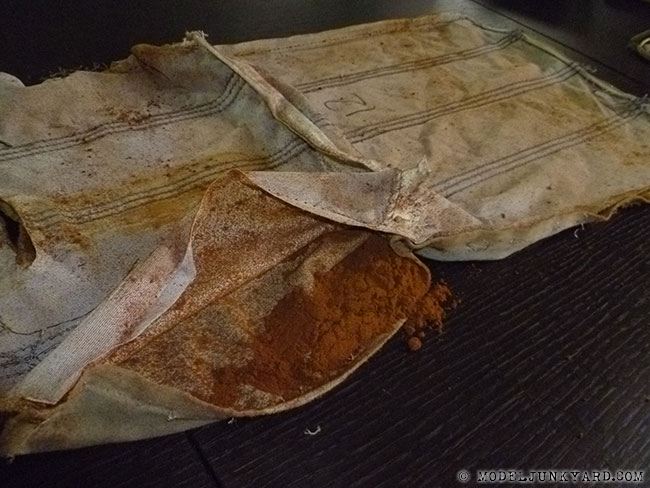
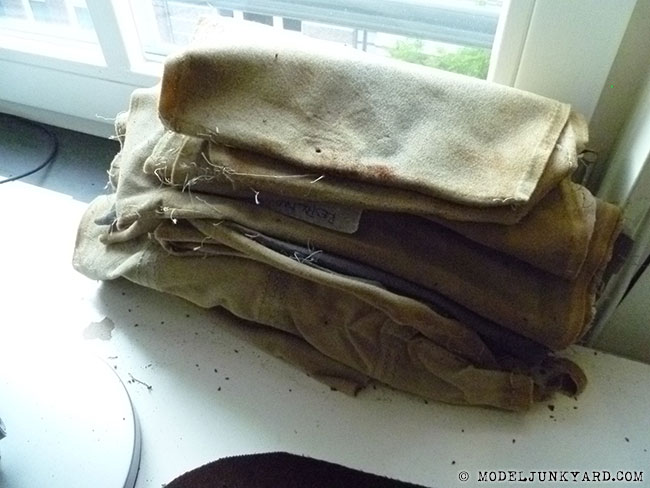
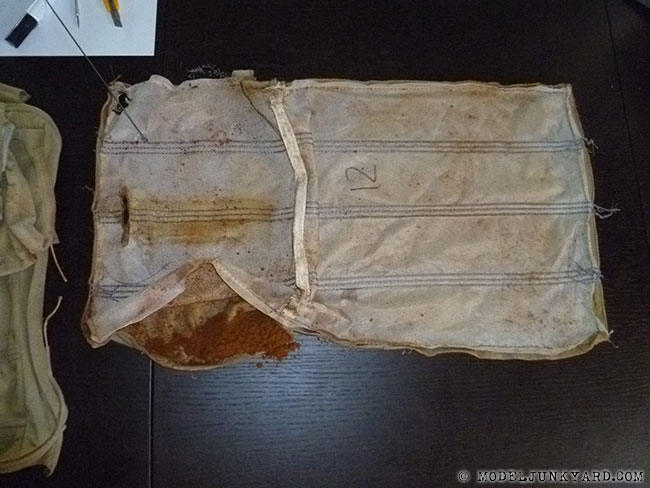
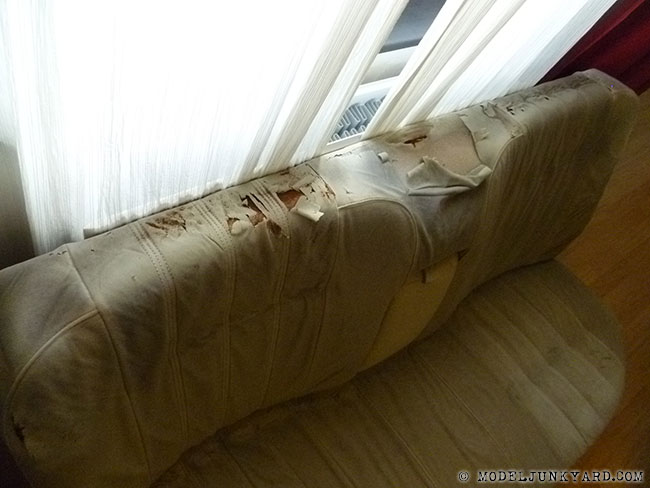
The time in Spain left many scars in many areas of my life… and also the good old Granada got many scars from that time. Spaniards do not take too much care of their cars. When parking their cars they just open the doors until hitting the car standing next to them, the parking assistance system consists of hitting the car standing behind and in front of you. And the sun… the sun in Spain is great BUT in the summer EVERYTHING burns and melts under the midday sun. The interior of my Granada literally disintegrated under such immense heat and UV-ray overdose. Although I tried to park in the shadow as often as possible, after a few years in Spain it was only powder left. I improvised seat covers with some grey fabric. I thought that I could stop the disintegration process by covering the seats. I thought I would be able to find some similar fabric some day and simply replace the “burned” areas. No, no. I couldn’t have been more wrong. The disintegration process continued under the seat covers… as I found out a few weeks ago after removing them. The powder that you see in the picture is what once was the padding foam between the fabric layers.
In general I took good care of the car but I never saw it really as a “classic” car (I’m more into ’50s cars). The Ford Granada was more an old daily driver “brick” to me than a nice classic car deserving to be restored and kept original. Anyway, maybe because of my general love for cars, at least, I just took care enough to keep it running and in general good shape.
Time passed and nowadays, specially in The Netherlands, you just see “euro and asian blobs” on the streets. My good old car-shaped Granada stands out among all KIAs, FIATs, OPELs, VWs, etc (dutchmen are really cheap when buying cars!). I started to get a special feeling about my car and I thought it might be a nice thing to give it a minor restoration before it hits the 100.000 km (yes! My Granada is still under 100.000 km!)
HOW I GOT A PERIOD CORRECT SEWING MACHINE (by chance)
A few months ago I mentioned to my mother in law that I was considering making a new upholstery for my car. Since she has a sewing machine I thought she was the right person to ask for a few tips about sewing machines and sewing in general (I had no idea at that time).

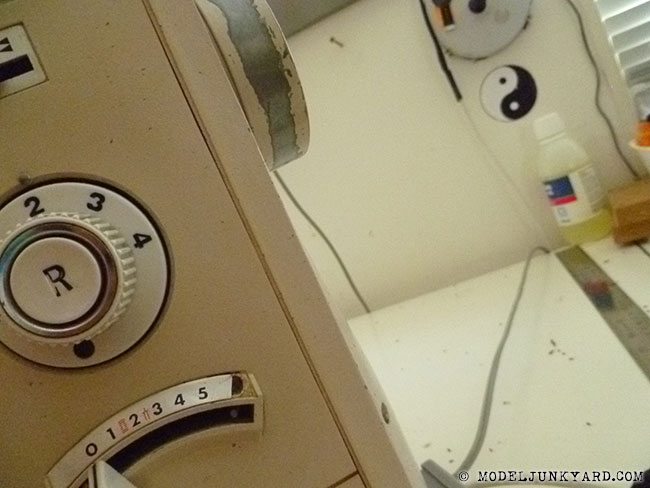
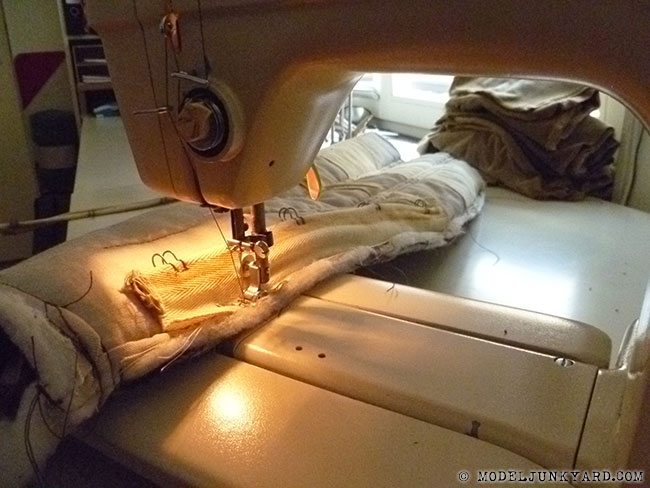
A short time after that she surprised me with a nice present. She had bought a new sewing machine and gave me the old machine as a present. The sewing machine is period correct. At least as old as my Ford Granada, maybe a little older. We are not a restoring a Bugatti here. The sewing machine doesn’t have to be period correct, but it was just a nice coincidence.
She also told me about a big fabric fair taking place around that time. I went there and scored 10 meters of brown velvet for an astonishing discount: €50. I bought a few more things such as thread, deck padding, foam, etc.
A few weeks ago I decided to start with this project and that’s why it has been so silent around here. I’m sorry guys, I had to put all my scale model project on hold. We are moving next year and I knew “it’s now or never”. My deadline for the upholstery is the moving day (but I’m sure I’ll be ready much earlier). I work almost every evening after dinner, from 8pm ’til 11 pm. That way I can put 3 or 4 hours a day in the project.
DOING THE CAR UPHOLSTERY
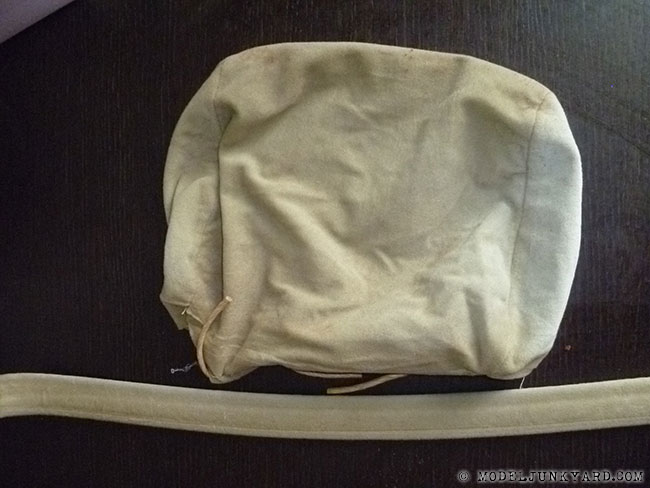
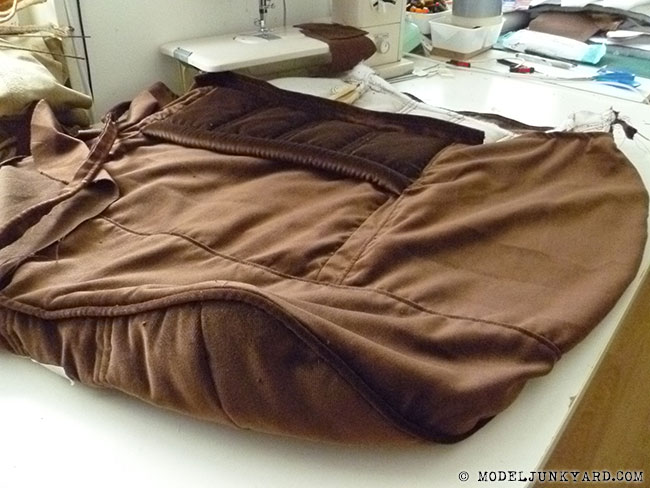
Removing the upholstery
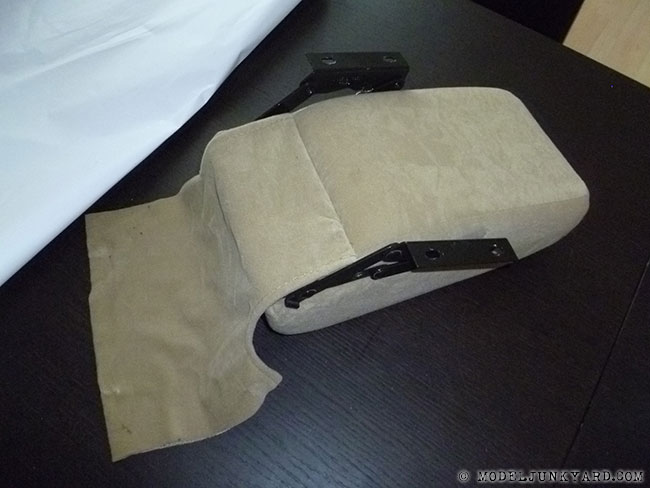
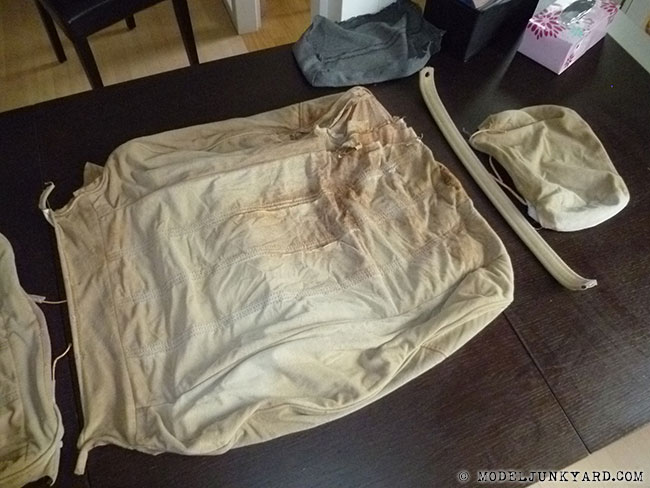 I started by unbolting the car seats and carefully removing all the upholstery. I t was more complicated that I expected. During that process I learned how upholstery is attached to a car seat… by hundreds of metal hooks, strings, springs, etc. Removing everything without destroying everything in the process was a little challenge.
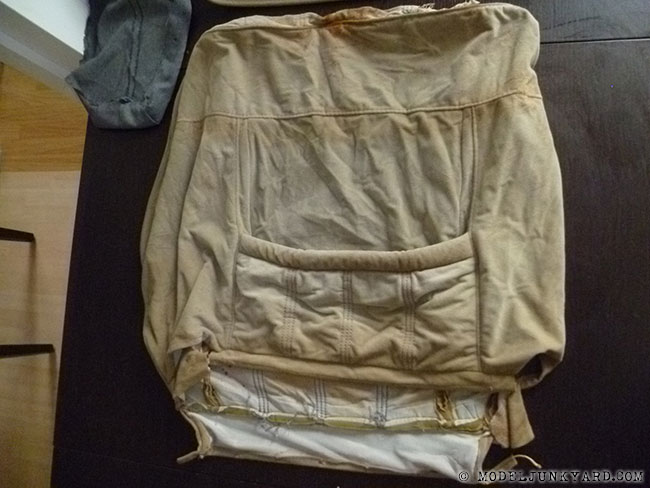
Taking apart the upholstery
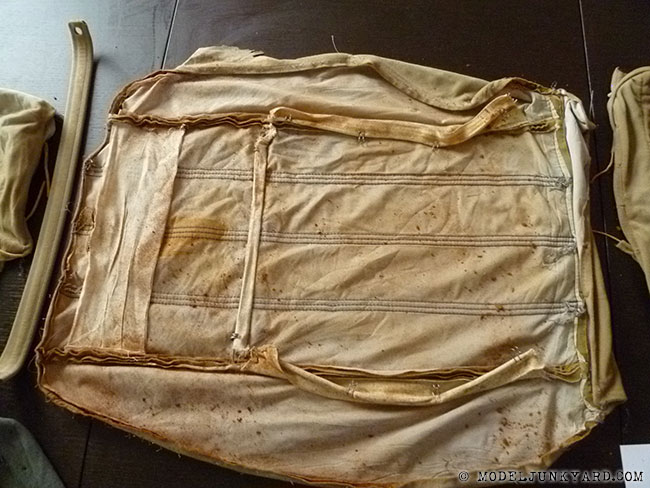
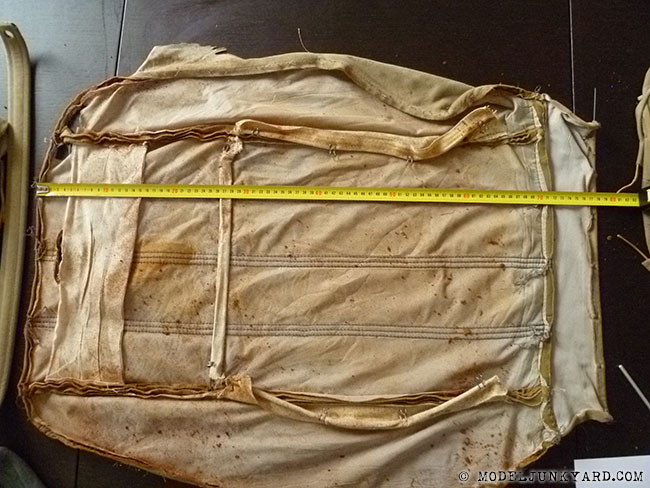
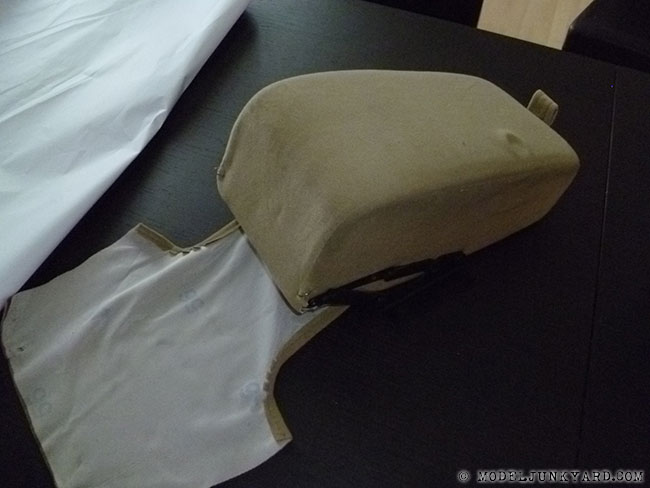
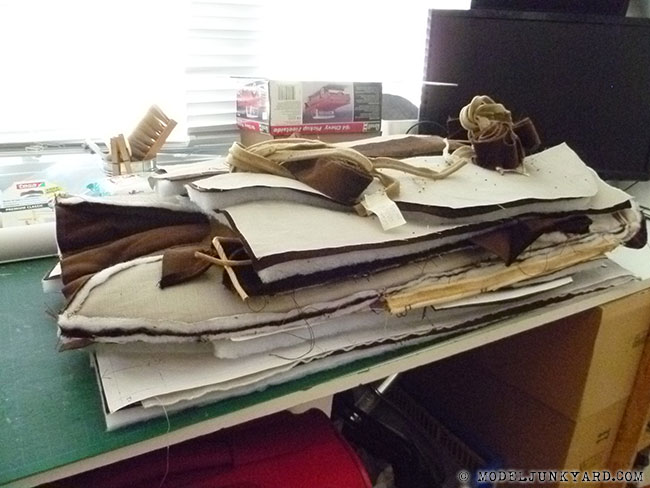
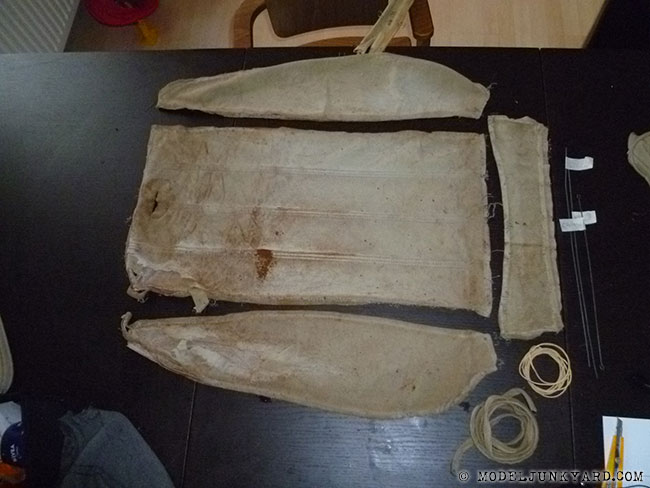 I finally was able to remove all the upholstery. After that I took all the upholstery apart in order to get each individual fabric piece flat on a piece of paper.
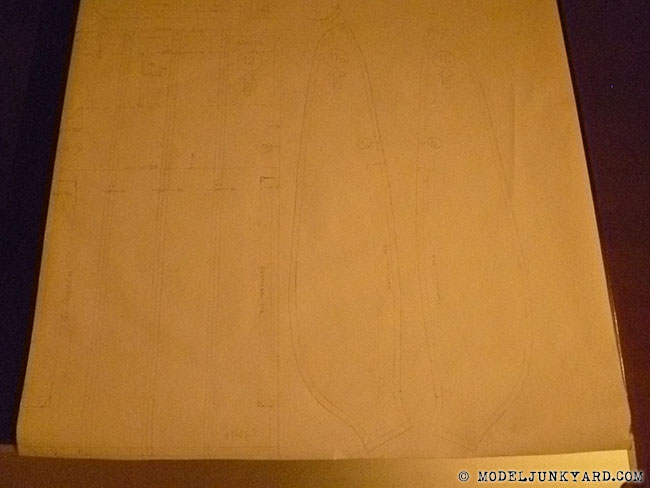
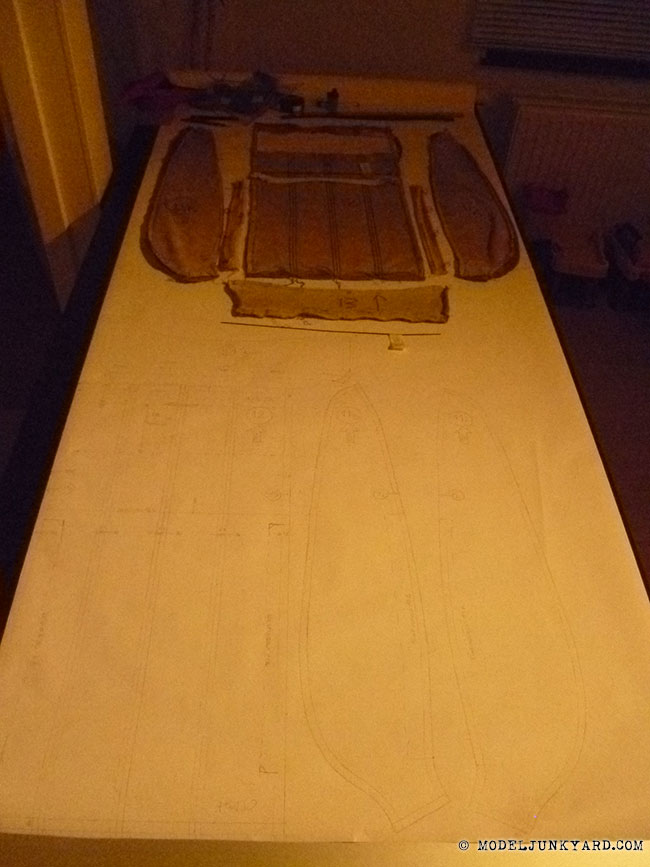
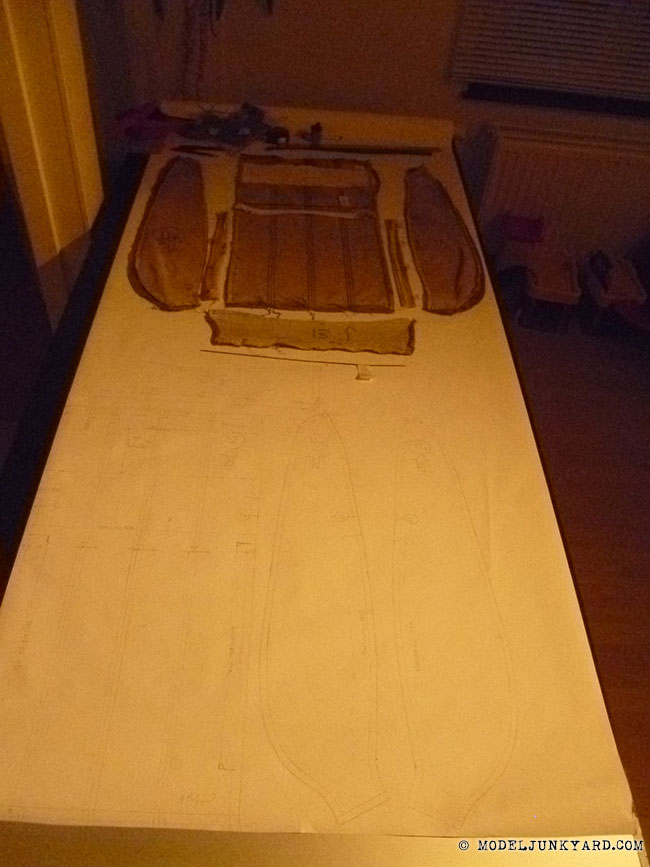
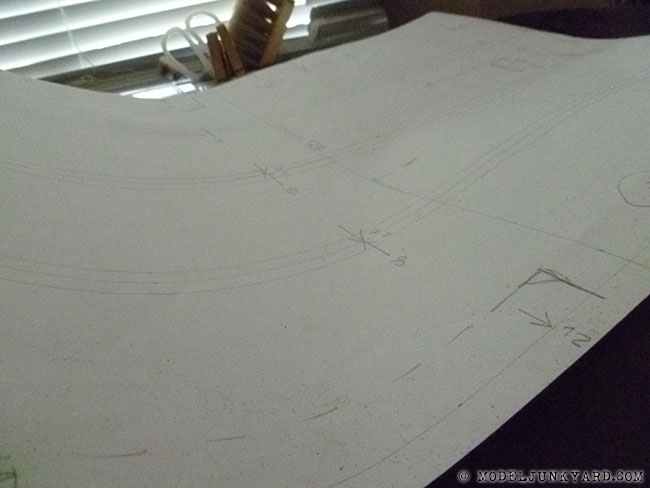
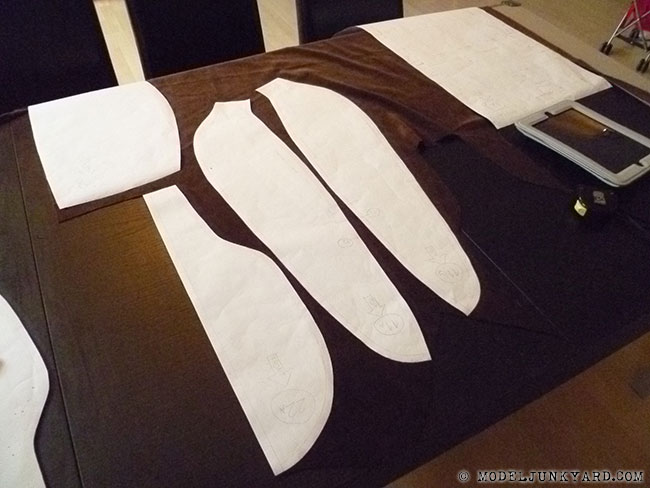
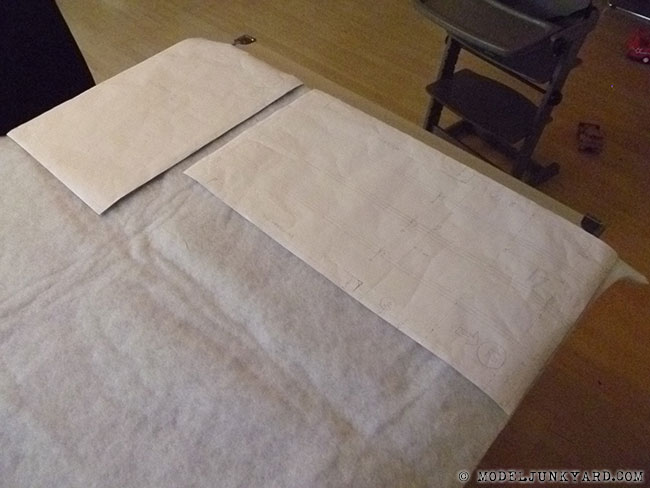
Recreating and drawing the upholstery templates
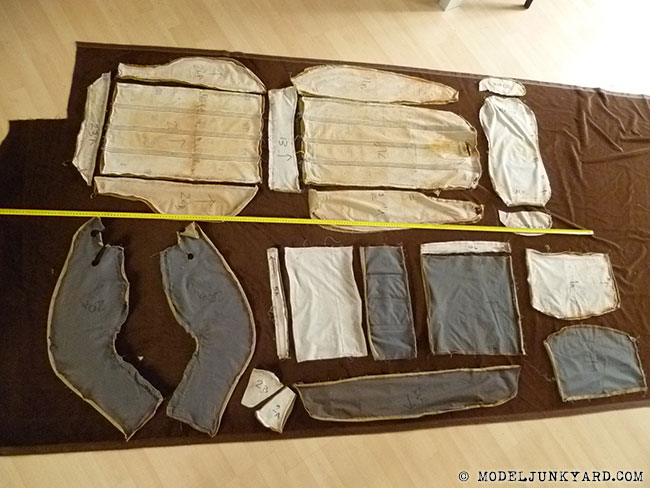
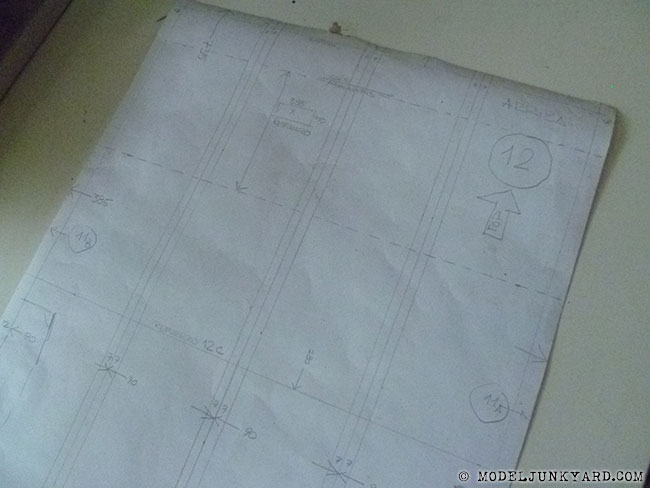
 I put all the upholstery pieces on a roll of (architect) paper and draw all the shapes. Some pieces were in quite a good a condition and it was easy to draw it’s original shape. Others were very damaged, deformed, disintegrated so I had to recreate the shapes by comparing all pieces and guessing how the original shape might have look like.
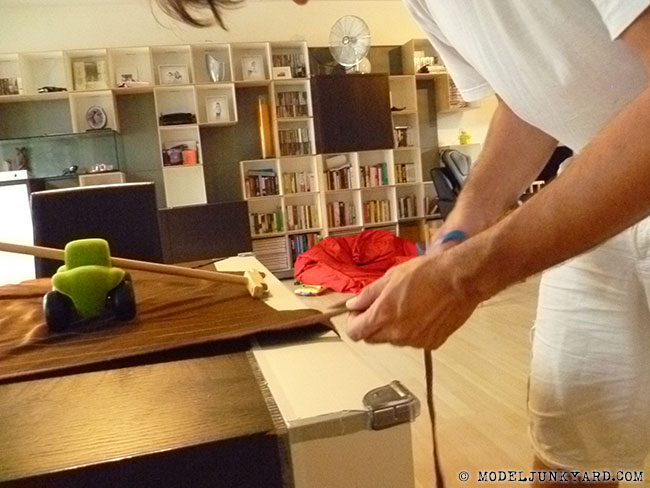
I decided to make it right and draw “perfect” templates on paper in order to keep for the future and/or be able to make copies for other Ford Granada enthusiasts. This means drawing the position of tension springs, upholstery reinforcements, position and style of decorative stitches, piping, etc. Drawing the templates is a project in itself and it took me approximately 8 hours to draw the templates of one front seat and all accessories.
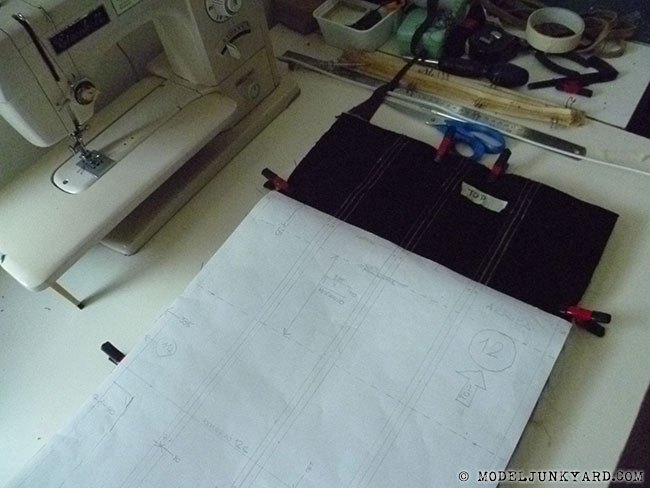
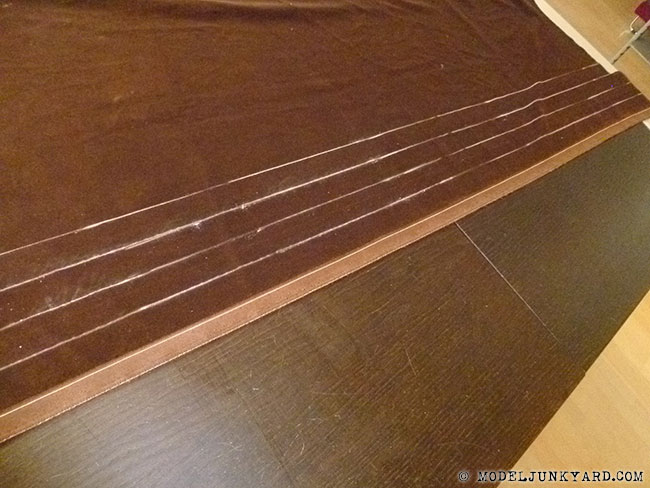
Cutting the fabric
 After drawing the templates I was ready to cut the fabric. As I’m using velvet I had to pay special attention to the fabric direction. This means that you can’t just throw your templates on the fabric and start cutting. You first have to puzzle the way all pieces will most efficiently fit on the fabric paying attention to the fabric direction. Cutting the fabric for a single seat took me approximately 4 hours. Some pieces I had to cut 3 times out of different materials as they are are composed by 3 layers: velvet-padding-fabric.
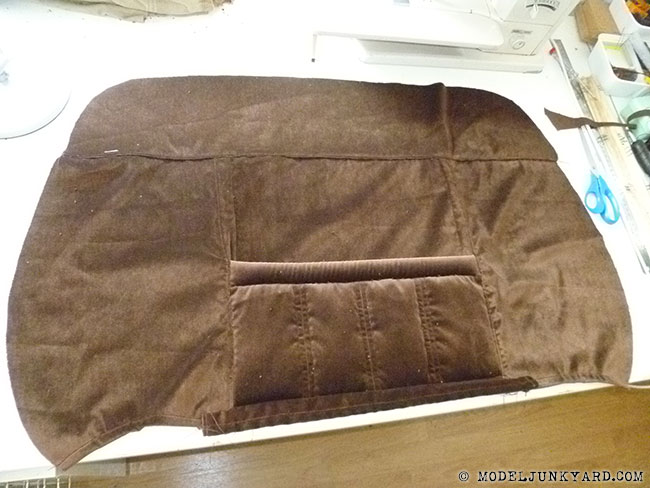
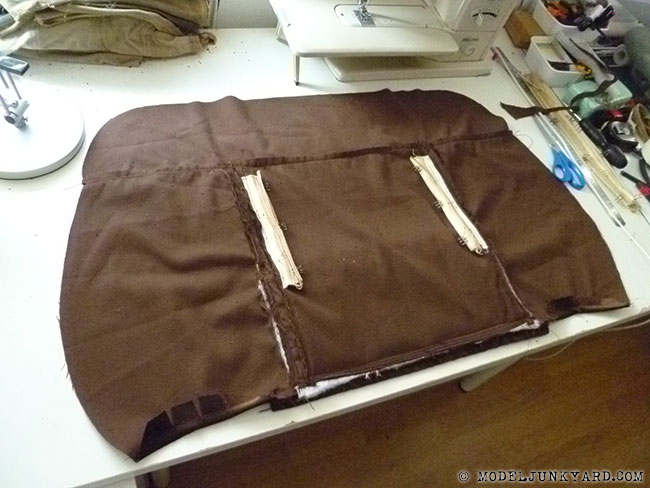
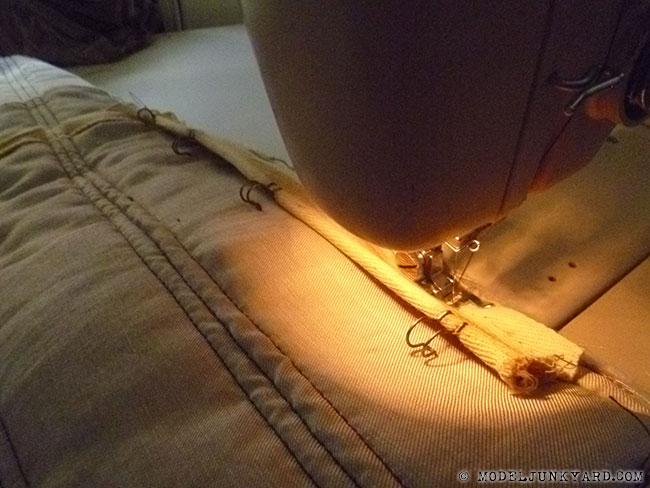
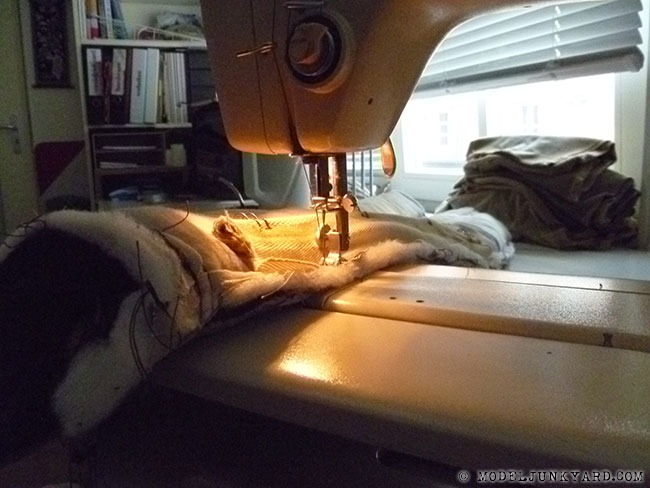
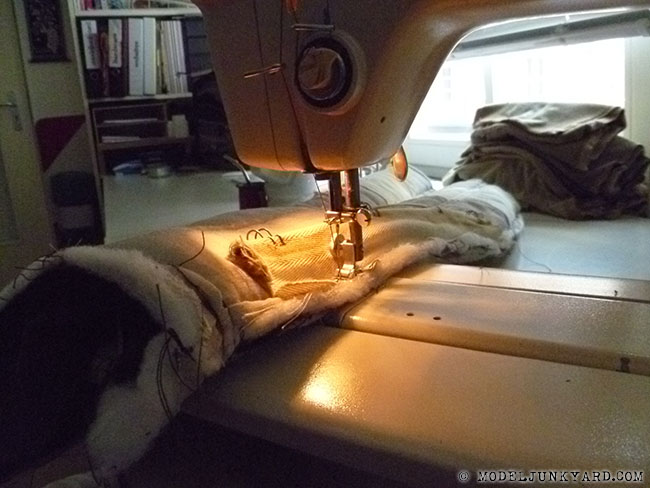
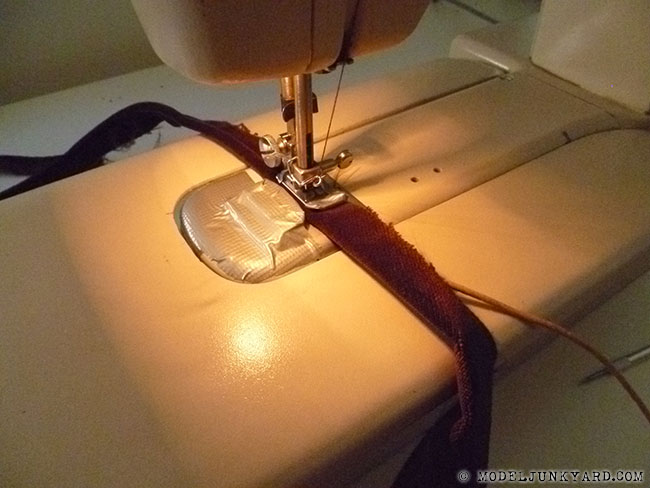
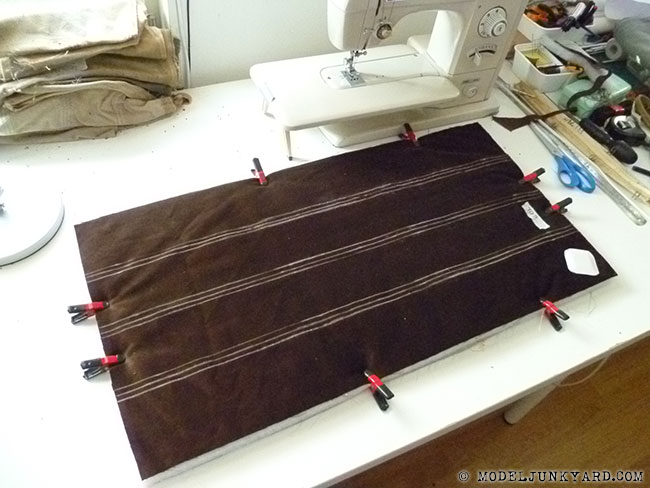
Sewing the upholstery
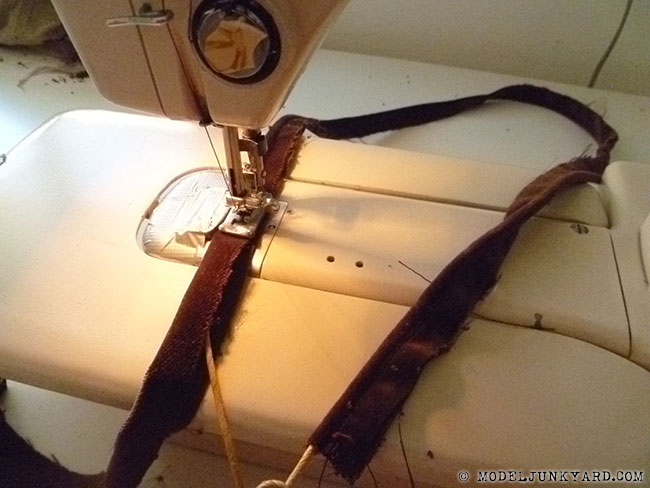
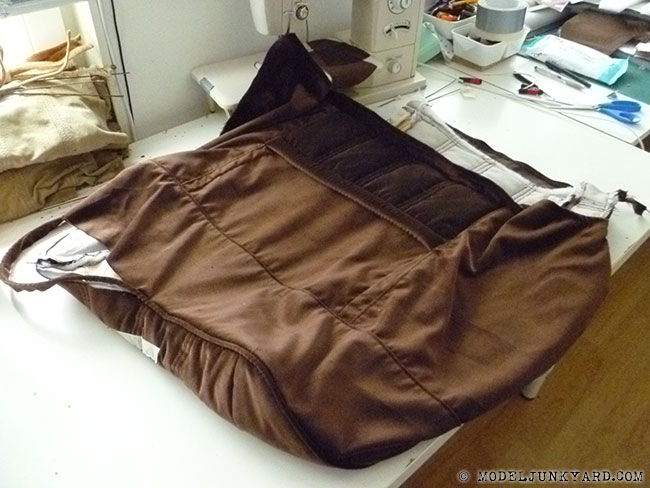
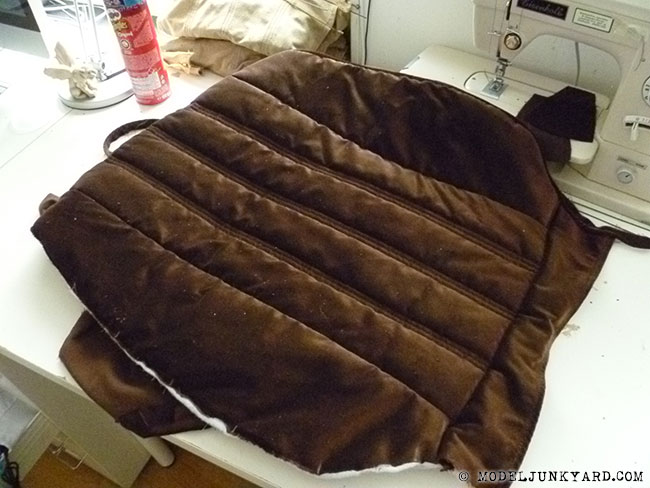
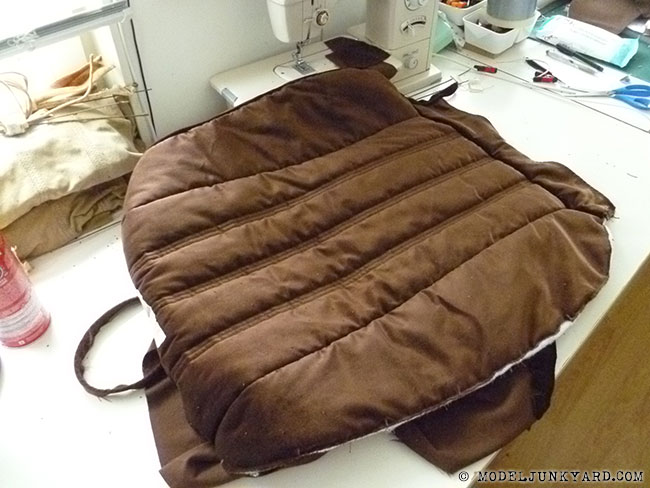
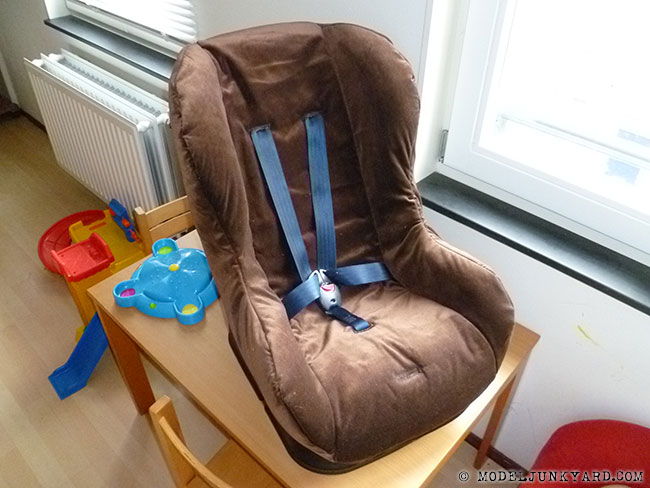 In order to get to know the sewing machine, all the settings and functions I decided to start practicing with an old baby car seat. I learned quite fast how the machine works. Being used to work with zero-mm-tolerance on scale model building I was specially happy when I realized that sewing offers a few millimeters tolerance.
 I soon realized that when sewing a complex project such as car upholstery, you have to pay special attention on the order that you sew the parts. There is only one right following order to sew everything in place. It’s a logic game, but quite obvious when you think a little bit about it.
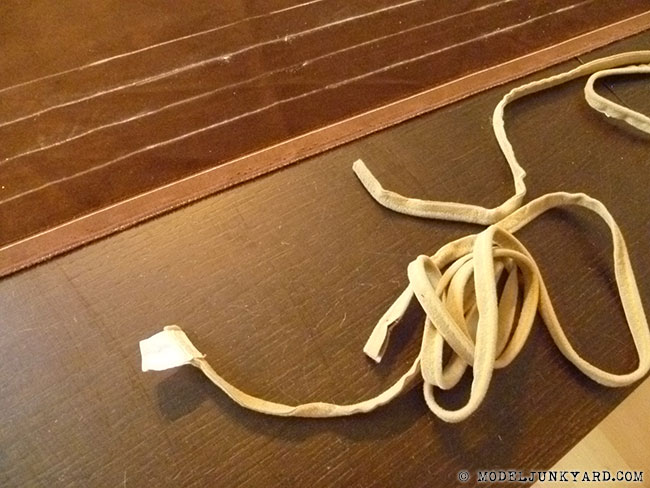
Recycling tension springs and piping
 While dismantling the original upholstery I realized there were lots of tension springs, reinforcements and piping involved. After having a good look at them I realized that they were in good condition and, after some cleaning, I was able to recycle all of them. Thanks to my carefully drawn templates I was able to sew all special pieces back in the right place.
DIY Upholstery time management
 I kept track of the time involved in each to have an idea of how much time it costs a DIY upholstery project like this. Take into account that when I started with this project I was totally inexperienced. It’s the first time I’m doing car upholstery and it’s the first time I’m sewing at all. I must admin I’m a very handy guy and I learn to do stuff really fast. Anyway, I think that the following time schedule might be a quite accurate time estimation for anyone wanting to this for the first time.
4 hs – unbolting the car car seats and removing the original car upholstery
2 hs – taking apart the upholstery of 1 front seat and the rear bench
8 hs – drawing the templates for 1 front seat and the rear bench
8 hs – cutting the fabric for 2 front seats
4 hs – cutting the fabric for the rear bench
2 hs – sewing accessories: 2 armrests, 2 headrests
24 hs – sewing 2 front seats (seat base, backrest, backrest’s backside including pocket)
10 hs – sewing the rear bench (seat base, backrest)
4 hs – mounting the upholstery on 2 front seats and bolting the seats into the car
2 hs – mounting the upholstery on the rear bench and bolting the bench into the car
68 hs – TOTAL
Taking into account that I put at least that same amount of time (or even more) in each of my scale models, I get the feeling it’s quite fast for such a “big” result.