As I’ve told you some weeks ago, we started working on this double project to make a DVD out of it. The idea is to show you how to build classic stock cars. We got inspired by Revell’s Black Widow kit – but that wasn’t enough. Although the kit is great, you can still make it better – with just a little work. And what’s with other cars? We felt attracted by the challenge of building Firefall Robert’s Ford Fairlane Sunliner – just to keep things interesting.
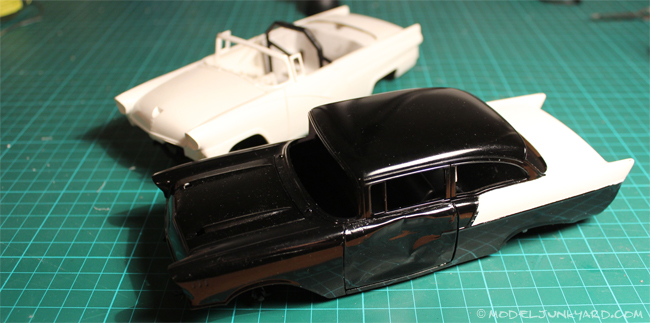
As you can see on the title pic, the bodies are now painted, ready for details and final assembly. As I was just about to start putting things together, I thought: “ok, I can’t leave things like that in the engine compartment”. So I got myself working on Fireball’s engine.
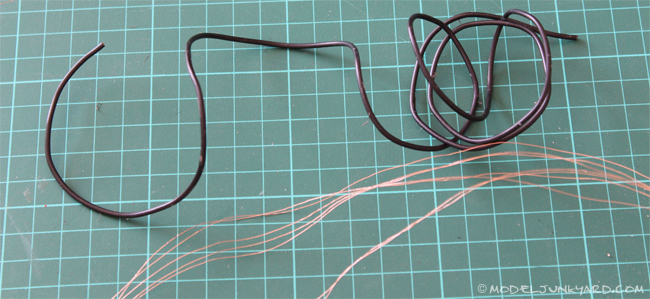
I decided to scratch build the ignition cables. I know you can buy great stuff on several known shops and surely they have awesome material there. I just wanted to do it right away – I didn’t feel like placing the order, waiting until it comes and so on. Plus, I thought, this may be interesting for some of the guys around you who live in remote places of this world, where you don’t get all that fancy aftermarket stuff (without paying more the shipping than for the material). So I took a piece of old cable and carefully separated the wires from the cable coating. The wires will be used as ignition cables and the cable coating can be used for water hoses in the engine compartment. Two birds with one stone!
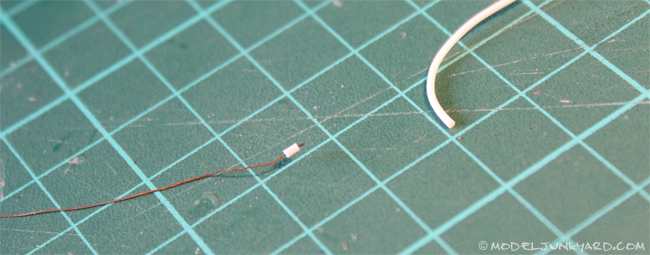
A thinner cable coat I had was helpful to make the plugs that go on the spark plugs.
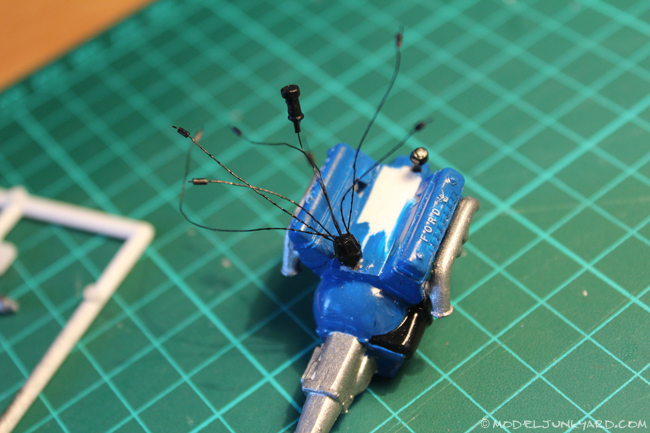
I made nine tiny holes on the distributor (eight for the cilinders plus one for the coil) and “plugged” my cables there. I wet the tip of the cables with superglue and then placed them into the holes. I painted it all after the glue was dry.
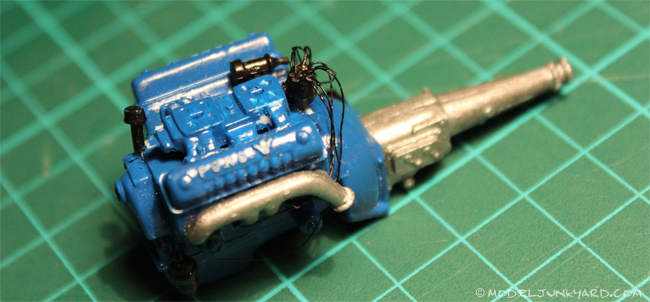
I made some holes on the engine block and then superglued the cables there. The coil was placed after consulting several pictures on 1956 Ford engines. After it all dired, I gave the cables a second look. You have to make sure that the cables “lay down”. Think of the real-size cables. They are heavy enough that they can’t hold their on weight, so they bend down right after coming out of the distributor.
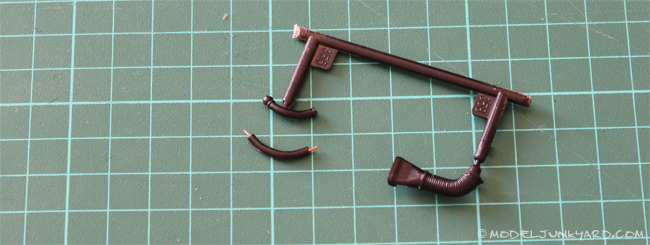
As for the hose, here you have an example. I used the cable cover from the other pic and put a thicker single wire it it, so I was able to give the hose some shape. Now comes the moment of the truth, after placing the scratch built part next to the plastic part: is the scratch built hose really better? Well, honestly not really. But sometimes you may have to do your own hose for some custom rat rod or because you lost the kit’s hose. Here’s how to. Or you buy after market parts.
I hope this could give you some inspiration.



Thanks for share with me the new new\s and projects, you have a wondeful web side…CONGRATULATIONS and Thanks again
Hey Martin,
thanks a lot fot the message! I’m glad you enjoy our work!
Iggy
Wonderful how to posting! While I buy aftermarket wires for ignition cables (living in Brazil, I buy a lot at once so to minimize mail price versus items value).
But I developed exactly the same technique to use with 1/43 kits!
Another option is to use solder wire. They came in many sizes and are perfect to position. Also, I sometimes get a common copper wire of some dimension and file it to the dimension I need (of course not for ignition wire, but for a rollcage or some tubing).
{}Overtake
Thanks Sylvio for the comment and for the hint with the soldering wire!
Iggy
hi i realy enjoy your website,i get lots of good ideas, as the plug wires go i make all my own plug wires and dist i also open the doors and trunk and make hinges for them .i make small springs for the engine linkage thanks keep up the good work.hay you came get dirt from a vuicam cleaner.
Hi people !!
As always your information is fantastic and i really appreciate all the mail you send me.Let me ask my son how to put a picture in here so you can see my 1955 chevy Bel Air i am restoring,but at this time it has a lot of rust.
My best regards.
Jesús Castillo I
Hi Jesús, Thank you very much for your kind words! Comments like yours give us the energy to continue with lots of pleasure. Believe me It’s a lot of work to keep this website running! About the pictures, we don’t have a feature yet for people to upload pictures into the comments, but feel free to send it to us per email to info (at) modeljunkyard (dot) com
Muchos saludos!
Seb
Iggy,
I’m doing the same ignition work on a ’50 chevy pickup. The engine (straight six) needed more detail so plug wires and a fuel line are in progress now. Your site is a great inspiration!
Thanks,
Brian
Iggy As an autobody repairman I do metal welding on the cars. If you know someone who works on full sized cars in a body shop, have them save you some of their mig-welding wire. It’s thin and can be bent easily to any curve. I have been using black thread for spark plug wires but like you said the wires have to lay down more because of their weight. You make it seem pretty easy to do it a much better way. I like the white wire ends as spark plugs! Cool! If a person got really insane, he could add the plug wire clips that hold all the wires together. Nuff said . Robert Gillmeister New York State,USA
Hello Robert,
thanks for your comment and the idea about the mig welding wire. It is really cool to hear how others do this kind of stuff!
The braket to hold the wires together shouldn’t be hard to make. The wire clips, though, may be quite hard.
Iggy
If you don’t mind me asking, how did you make the holes? I’m currently working on a 1941 Chevy pickup model with an inline six and the distributer is TINY! I’ve almost given up on the idea. Do you have any tips?
Hi Lane
I know that kit, I enjoyed building it! I’ve used a Tamiya drill for that. They have a manual one (no motor, you power it with your hand) and they have very think bits.
Iggy